How To Repair Camping Chairs?
Have you ever had to wonder how to repair camping chairs?
Camping chairs are subjected to a lot of wear and tear, mainly if you frequently use them on various outdoor adventures. Over time, the legs may weaken or break, the fabric may tear, and the chair’s overall functionality might be compromised.
However, with some basic tools and a little know-how, you can quickly repair camping chairs and their most common issues eventually prolonging their lives.
Table of Contents
Assess the Damage
Before proceeding with any repairs, it’s important to thoroughly assess the damage. Examine your camping chairs and their every component, including the legs, fabric, armrests, and reclining mechanisms.
Identify any broken parts, tears, or areas that need attention. This assessment will help you determine the specific repairs needed and gather the necessary materials.
Assess if it is worth repairing
Sometimes the damage is beyond repair and if you think you can fix the chairs, you are only wasting your time. So, initially make sure to analyze if the damage your camping chairs have, is repairable or if would you just be putting all your efforts in vain.
It is advised that if the wreckage is more than what you can handle, don’t try to fix them yourself. Either take them to the experts or buy new ones.
Tools that you need
If the camping chairs are worth repairing, then you might need a handful of tools to make that happen. Here’s a general list of the equipment you possibly could need for the repair:
- Fabric Scissors
- Duct Tape
- Screw Drivers
- Fabric Patch (Preferably Denim)
- Thread and Needle
- Glue (Adhesive, Epoxy, Fabric glue)
- Knife
- Drill Machine
- Wrench

How to Repair Camping Chairs (For Different Parts)
Repairing Broken Legs
One of the most common issues with camping chairs is broken legs. To repair them, you will need a replacement leg and some basic tools such as a screwdriver or wrench.
Carefully remove the damaged leg, making sure to keep track of any screws or bolts. Attach the new leg securely and tighten all screws or bolts. Test the repaired leg by applying some weight to ensure its stability.
How To Repair A Torn Camping Chair
Torn fabric can make your camping chair uncomfortable and unsightly. To fix a torn camping chair, you’ll need a patch of similar fabric, fabric glue or adhesive, and a pair of scissors.
The fabric can be denim cut out from your old jeans, or old backpack, or even a canvas-like material if you decide to purchase.

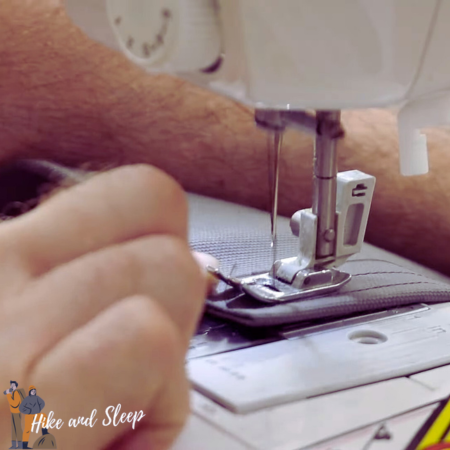
Start by cleaning the torn area and removing any loose threads. Cut the patch into an appropriate size and shape to cover the tear. Apply fabric glue or adhesive around the edges of the patch and press it firmly onto the torn area. Alternatively, you can even sew it if you are skilled enough; either using a sewing machine or manually.
Allow it to dry completely before using the chair.
Replacing Worn-out Straps
If the chair’s straps are worn out or damaged, they can be easily replaced. First, remove the old straps by carefully detaching them from the frame. Measure the length and width of the old straps to ensure the replacement straps are the correct size.
Cut the new straps accordingly and attach them securely to the chair’s frame using screws or clips. Make sure the straps are taut and evenly spaced to provide optimal support.
Repairing Armrests
If the armrests of your camping chair are loose or broken, they can be repaired with some basic tools and materials. Begin by removing any screws or bolts holding the armrests in place. Inspect them for any cracks or damage. If the armrests are loose, tighten the screws or bolts.
For broken armrests, consider using epoxy glue or adhesive to bond the pieces back together. Allow sufficient drying time before using the chair.
Restoring Reclining Mechanisms
If your camping chair has a reclining feature that no longer functions correctly, it can be frustrating. To restore the reclining mechanism, start by examining the components and identifying any worn-out or broken parts.
Consult the chair’s manual or manufacturer’s instructions for specific guidance on disassembly and replacement. If necessary, order replacement parts from the manufacturer or a reliable supplier.
Follow the instructions carefully to restore the functionality of the reclining mechanism.
Cleaning and Maintenance Tips
Regular cleaning and maintenance can significantly extend the lifespan of your camping chair. Here are some tips to keep your chair in great condition:
- Remove any dirt, debris, or stains from the fabric using a mild detergent and a soft brush.
- Make sure not to use harsh chemicals or abrasives that could damage the fabric or frame.
- Store your camping chair in a dry and cool place to prevent mold or mildew growth.
- Periodically check and tighten screws, bolts, or other fasteners to ensure stability.
- Avoid exposing your chair to extreme weather conditions, as it can accelerate wear and tear.
Conclusion
It is a cost-effective and practical solution to repair your camping chairs yourself, that allows you to enjoy your outdoor adventures for years to come.
By following the step-by-step guide outlined in this article, you can address common issues such as broken legs, torn fabric, worn-out straps, loose armrests, and malfunctioning reclining mechanisms.
Remember to conduct a thorough assessment of the damage, gather the necessary tools and materials, and proceed with caution to achieve successful repairs.
Read Also:
FAQs
To fix a hole in a camping chair, follow these steps: 1) Gather fabric patch, fabric glue or needle and thread, scissors, and a clean cloth. 2) Clean the area around the hole. 3) Cut a patch slightly larger than the hole. 4) Use fabric glue or sew the patch onto the chair, ensuring it covers the entire hole. 5) Let it dry or secure the stitches. 6) Test the repair by applying gentle pressure. Happy camping!
Repairing a tear in a canvas chair is easy: 1) Gather heavy-duty thread, needle, scissors, fabric patch, fabric glue (optional), and a clean cloth. 2) Assess the tear’s size and condition. 3) Lay the chair flat and clean the tear area. 4) Stitch the tear using small, even stitches or reinforce it with a fabric patch. 5) Let it dry or secure the stitches. 6) Test the repair for stability. Enjoy your restored canvas chair!
It’s recommended to clean and maintain your camping chair regularly, especially after each use. This helps prevent the buildup of dirt, stains, and other contaminants that can cause damage.
For most repairs, it’s important to allow sufficient drying time before using the chair. Follow the instructions provided for each repair method and ensure the repaired components are secure and stable.


